Tiles are one of the most popular flooring choices for home renovations. It’s an attractive and functional choice for kitchens and bathrooms. Plus, they’re easy to maintain. However, installing tiles in Perth can be daunting for someone who’s never laid flooring. The following is a breakdown of how you can easily lay tile as a beginner.
Keep Safety First
You want to keep yourself safe if you decide to lay your own floors. To do so, wear heavy-duty gloves and protective goggles to guard your feet and eyes against the broken shards of your old flooring.
Prepare and Purchase the Product
Before you make any purchases, you want to measure the area to account for any awkward or jutting areas. When you measure, round to the nearest whole number. This will help you figure out how many packs of tile you need to buy. Each pack covers a specific surface area.
To further prepare your floors, ensure they’re level and dry. Ideally, you’ll lay your flooring on the concrete floor.
You can lay flooring over existing quarry tiles and vinyl, but you need to make sure that that flooring is laid down firmly and properly. When you lay over vinyl tiling, ensure that you also coat the surface with a primer. If you’re laying over concrete or wood, then you should use an adhesive for your primer purposes.
Once you’ve figured out the type of flooring you’re working with, you’re ready to select your tiling. Contact your local tile shops in Perth, such as our team here at Ceramic Tile Supplies, for help on design and colour options.
Plan the Layout
The first tile you lay is your “key tile”. It determines the entire layout of your tiling, making it the utmost importance that you get the positioning right. You’ll want to ideally start somewhere near the centre of your room and work out in each direction. Since many rooms aren’t perfect squares, starting out at the edge will leave you with a huge mess.
To ensure you don’t mess up the process, dry lay a row from the centre to the wall. If you end up with a tiny slither of tile against the wall then move that entire line of tile one tile width away. Once this line is laid correctly, keep dry laying your floor in the opposite direction and move your key tile around if things are not lining up.
When you’ve found the perfect location for that first tile, mark it down with chalk. If the edge pieces are not perfectly aligned, you’ll need to mark where they meet the wall and cut it to shape.
Start Tiling
Lay down the tiling the same way you dry laid it, starting with your key tile and working out toward the walls. Keep in mind, as you choose your direction, you want to avoid stepping on your newly laid floors. If you see no way of avoiding your newly laid tile while you work, think of working in sections per day.
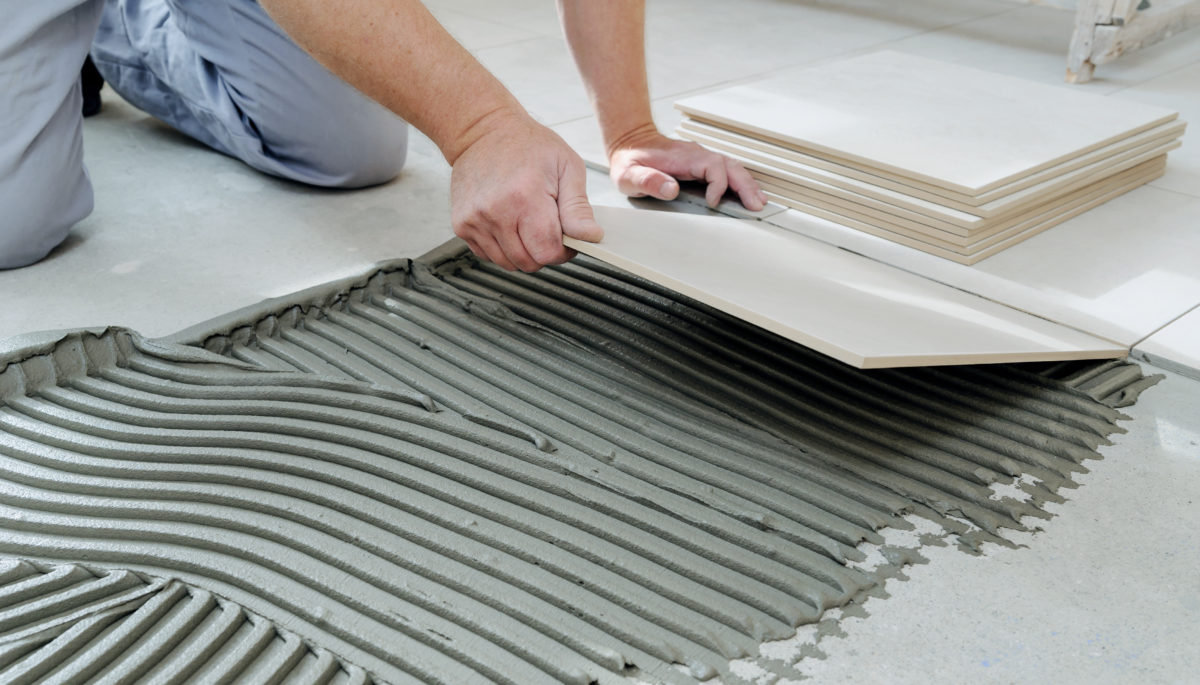
When you first start, spread out about a metre’s worth of adhesive in the centre of the area. To spread it evenly, use a spreader or notched trowel. A spreader leaves just the right amount of product so that the tile actually sticks. Lay your first trowel down, onto the mark you’ve placed before starting, and twist it slightly as you lay it to get rid of any air bubbles.
Work out from the key tile, using plastic spacers, toward one wall. Whenever you get done with every metre or two, check to ensure that your floor is level with a spirit measure. Once you’ve completed this row, redo these steps at right angles so that your tiles are crisscrossing the room from your centre tile. Continue this pattern in rows in one corner of the room and work in quarters.
Once you’re done, wipe down all of your flooring to ensure there is no adhesive left to ruin your perfect new floors. Don’t put your edge tiles in just yet.

24 Hours Later
Once you’ve got your tile shaped by cutting it, you can fill the edges after the rest of the floor has set. Put a layer of adhesive onto the back of these cut tiles and press them into position, leaving them for 24 hours to set.
Get It Grouted
Before moving onto the grouting phase, make sure your tile is solidly set. Mix your grout well so that there are no lumps. Leave your grout sitting for 2 to 3 minutes to help break down these lumps and to release air bubbles.
If the tile you’ve laid is glazed, you can pour the grout over the flooring and spread it with a tool with a rubber edge to move it into place. For non-glazed, you have to gently place it into the cracks so that it doesn’t get on the floor’s surface and stain. As it begins to set, press the grout down with a wooden dowel to fill any air pockets or gaps. Have a damp sponge with you so that you can wipe away any excess.
The grout should harden in approximately an hour. When it is hard, you’ll want to wipe each tile with a damp cloth to make sure there are no grout stains that have escaped your attention. Be very gentle over the next 48 hours. Finish up your floors by sealing around the corners of the room with a flexible sealant the same colour as your grout.
Getting Started
Installing your own tile can be a huge job that takes a lot of time, energy, and patience. For those looking for help from tile shops in Perth, contact us today. We can give you a list of experienced and qualified professionals.